


Developing .NET Core Apps with Visual Studio Code
Jun 3, 2020 • 9 Minute Read
Introduction
Five years ago, Microsoft announced what eventually became .NET Core, an open-source and cross-platform implementation of .NET. This brought C# and .NET to macOS and Linux. One of the traits of .NET Core is that in addition to being platform-independent, the framework is also tool-independent. But this could result in varying development experiences. Microsoft's answer to this problem is Visual Studio Code, a text editor inspired by Microsoft's flagship Visual Studio. When you choose Visual Studio Code for .NET Core development, you get a consistent cross-platform developer experience on Windows, macOS and Linux.
This guides builds upon and assumes you have read Visual Studio for Software Development.
Extensions
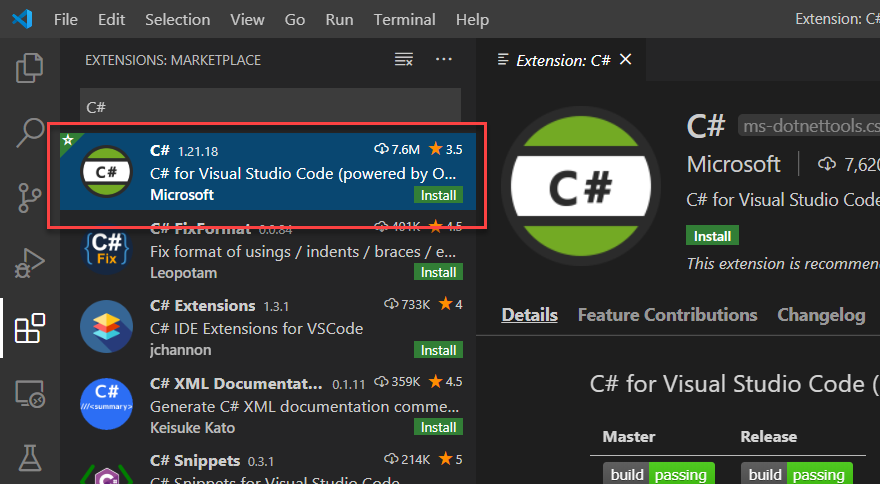
The .NET Core development experience is powered by the C# extension available from the Visual Studio Code Marketplace. To get the extension, press Ctrl-Shift-X / Cmd-Shift-X (all keyboard shortcuts in this guide are for macOS) to open the Extensions pane. In the search bar, search for "C#". Install the extension from Microsoft by clicking Install.
Also, install the C# Extensions extension. This adds a few shortcuts such as scaffolding new classes and interfaces. It's not under active development anymore, but it's still relevant.
More extensions will be introduced later on.
The Terminal
Visual Studio Code does not have a fancy user interface like Visual Studio does on Windows or macOS. There is no File -> New Project option. Therefore, in Visual Studio Code, .NET Core development makes heavy use of the command line. Press Ctrl-Backtick to open and close the terminal.
To create the demo app for this guide, run the dotnet command in the terminal.
$ dotnet new console -o GuideDemoApp
This will create a new .NET Core console project named GuideWebApp in a new directory called GuideDemoApp. Restart Visual Studio Code and open the GuideDemoApp project.
$ code -r GuideDemoApp
C# Extension Tooling
When Visual Studio Code restarts, it will open the Explorer pane on the left side of the interface with the GuideDemoApp directory at the base. Visual Studio Code will detect a C# .NET Core project in the GuideDemoApp directory and show a notification.

Debugging inside of Visual Studio Code is a feature of the C# extension. But to enable it, some metadata must be added. Click Yes in the notification and the metadata will be added to the project in the .vscode directory. After a moment, the notification will automatically disappear. In that case, press Ctrl-Shift-P / Cmd-Shift-P to open the command palette and search for the command .NET: Generate Assets for Build and Debug. In either case, you'll be able to to switch to the debug pane by pressing Ctrl-Shift-D / Cmd-Shift-D. At the top of the pane is a dropdown list with two options.
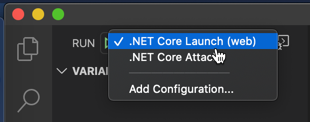
The .NET Core Launch (console) option will launch the app in debug mode, which you'll see later.
Editing
First, you need to write some code to run. This example begins with creating a user management app, or at least a portion of one. The one thing it needs it a user class. The C# Extensions extension adds many features to the editor. Right-click in the Explorer pane and select New Class. In the command palette, enter the filename DemoUser.cs. This will scaffold a class named User in an appropriate namespace. The class will have two public properties. You can generate these using code snippets similar to Visual Studio. Type the snippet prop and press the tab key.
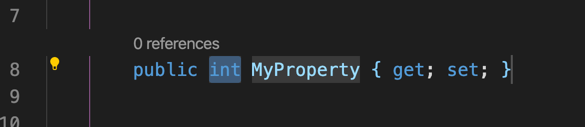
This generates an auto-implemented property. Notice that the type is highlighted so you can start typing string to change it. Press tab again to highlight the name of the property and change it to Username. Repeat the process to create another property of type string named Password.
Finally, override the ToString method to render an instance of the class.
      public override string ToString()
{
  return $"<User: {Username} / {Password}>";
}
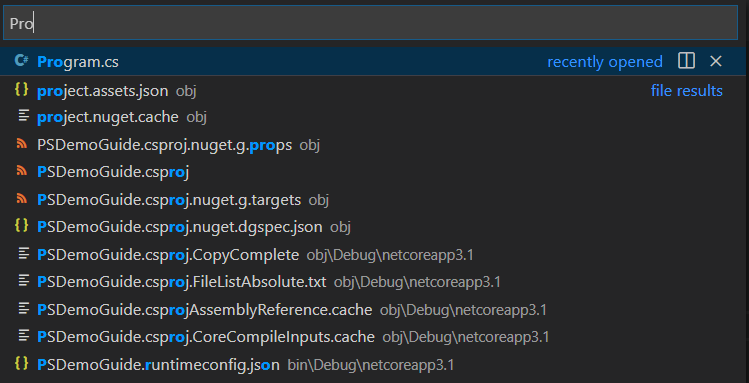
Press Ctrl-P / Cmd-P and start typing the name of the file, Program.cs. Visual Studio Code will filter the files as you. Press Enter to open Program.cs once it is highlighted.
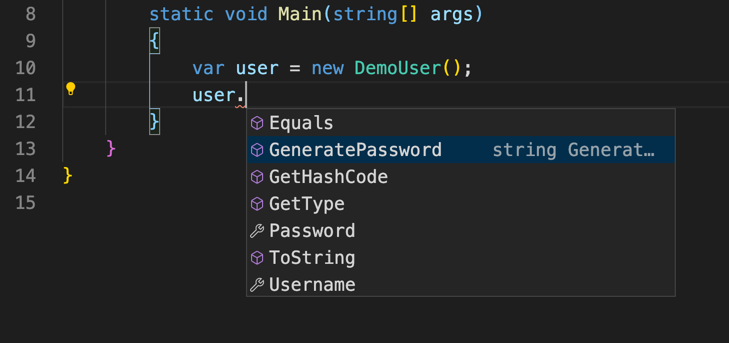
In the Main method, create a new User and write it to the console.
      var user = new DemoUser();
user.
Just like in Visual Studio, Visual Studio Code displays a list of valid completions after the dot.
      var user = new DemoUser();
user.Username = "jdoe";
user.Password = "abcxyz";
It looks like "jdoe" is not in the habit of creating strong passwords. To help them out, add a method to the User class that returns a string named GeneratePassword. Assume a strong password is at least one uppercase character followed by at least one digit separated by a dash. The total length (excluding the dash) should be at least eight characters. Since the method will join strings, use the StringBuilder class.
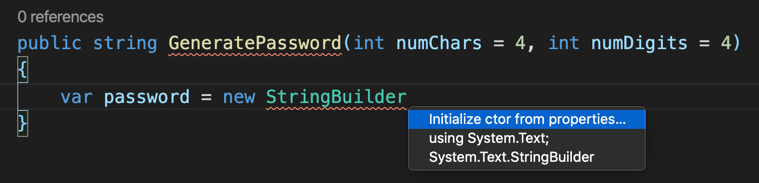
      public string GeneratePassword(int numChars.= 4, int numDigits = 4)
{
  var password = new StringBuilder();
}
Visual Studio Code draws a wavy line under StringBuilder because it cannot be found. Place the cursor on StringBuilder, press Ctrl-. / Cmd-., and choose using System.Text from the pop up menu to automatically insert the System.Text namespace and resolve the error.
Working with NuGet Packages
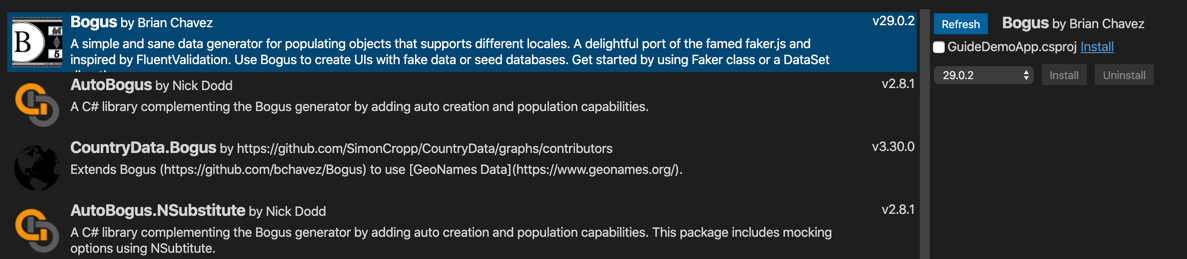
To help generate random passwords, you can use a NuGet package called Bogus. Adding NuGet packages is easy with another extension named NuGet Gallery. Go ahead and install it.
After installation, open the command palette and search for "NuGet: Open Gallery." You'll see an interface similar to Visual Studio for managing NuGet packages. Search for "Bogus." On the right side, click the Install link next to GuideDemoApp.csproj.
Back in the DemoUser class, finish off the GeneratePassword method. Remember to use the shortcut to add the Bogus namespace for the Randomizer class.
      var randomizer = new Randomizer();
password.Append(randomizer.String(numChars, numChars, Convert.ToChar(65), Convert.ToChar(90)));
password.Append("-");
password.Append(randomizer.String(numDigits, numDigits, Convert.ToChar(48), Convert.ToChar(57)));
return password.ToString();
Now you can update the code to create a new User in Program.cs. The Person class can also be found in the Bogus namespace.
      var bogusPerson = new Person();
user.Username = (bogusPerson.FirstName[0] + bogusPerson.LastName).ToLower();
user.Password = user.GeneratePassword();
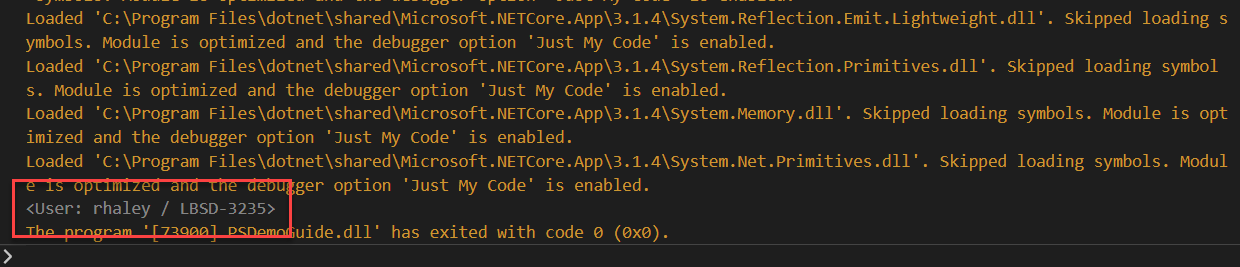
To run the app, add the following code to the end of the Main method:
Console.Writeline(user.ToString());
Conclusion
Visual Studio Code is not "Visual Studio Lite." It is a professional-caliber development tool. What you saw here is just a fraction of what the editor can do and the extensions that it supports. The screenshots in this guide were from macOS, but everything shown will still work on Windows and even Linux.
For more on developing .NET Core apps with Visual Studio Code check out:
Thanks for reading!

Advance your tech skills today
Access courses on AI, cloud, data, security, and more—all led by industry experts.

