Build a Multiplayer VR App That Works in Realtime
Use A-Frame in WebVR to build VR apps with something as simple as HTML. In this tutorial, we'll learn about a breaking new API that lets you build VR with a web developer's existing tech stack. Learn more today!
Sep 6, 2019 • 25 Minute Read
Introduction
Virtual Reality (VR) has become so well-known that it needs no introduction, in developer circles and beyond. However, developing VR apps is still a mystery for a major portion of all software developers. This is primarily because most existing VR ecosystems are closed, preventing developers from freely tinkering with VR code. Even if it weren't closed-source, the tech stack required for building traditional VR apps is pretty complex and a web developer, say, would rather not venture in that formidable direction.
In this tutorial, we'll learn about a breaking new API that lets you build VR with a web developer's existing tech stack. Let's dive right in!
What will we build?
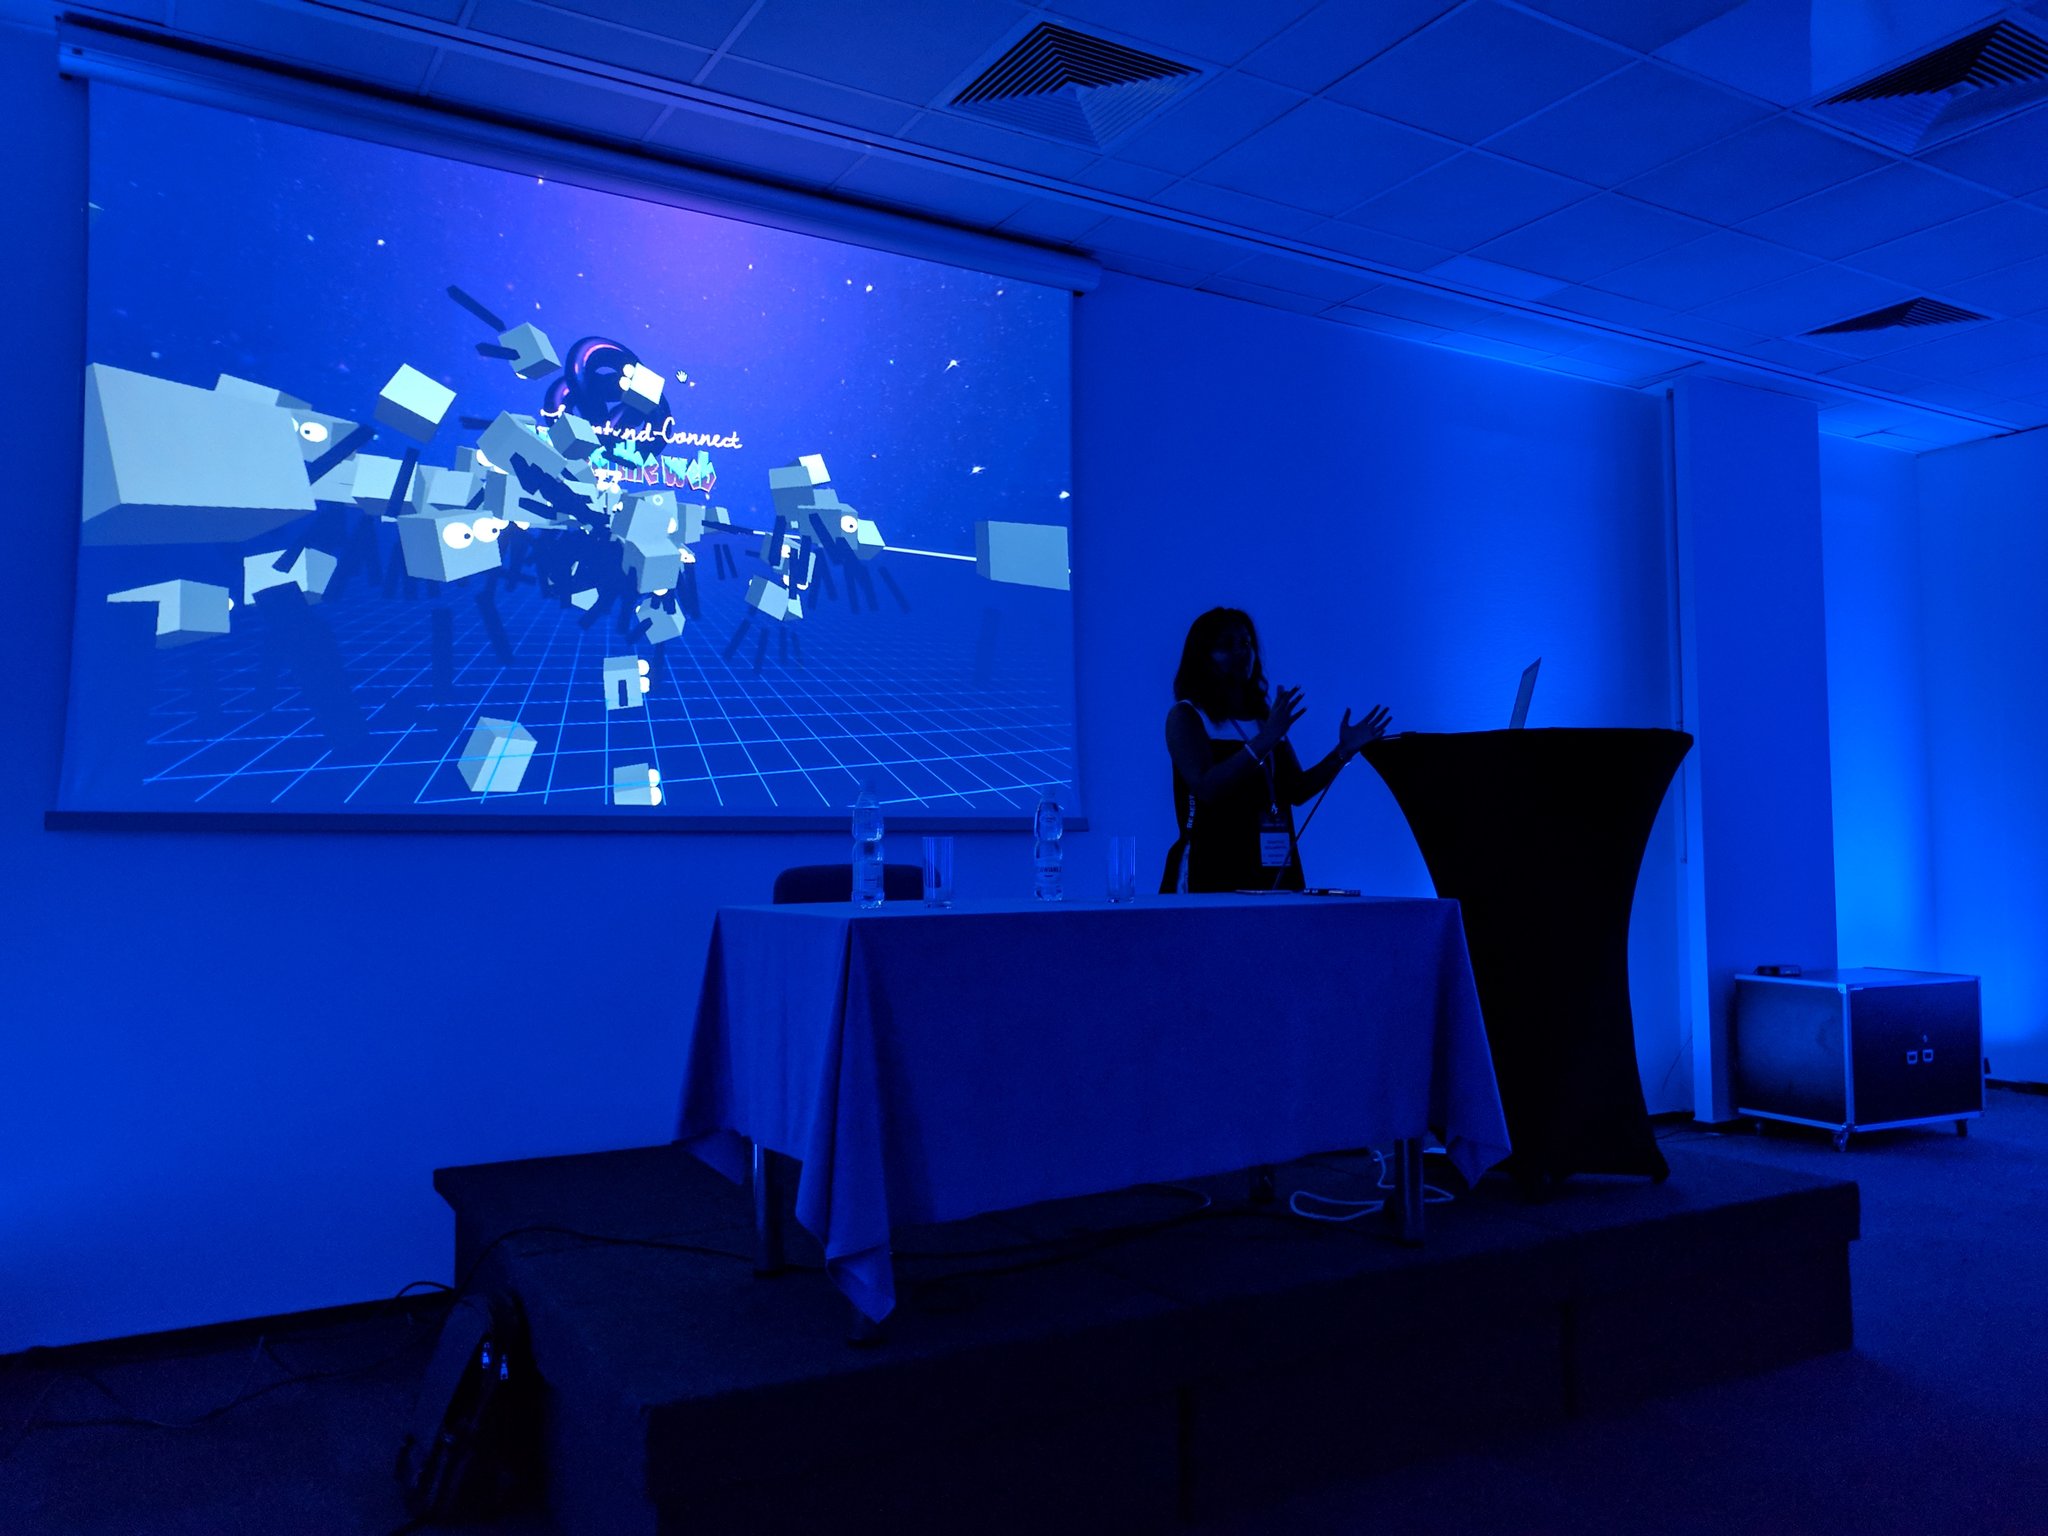
By the end of this tutorial, you will have a VR app similar to the one seen above. It will have a basic VR scene where multiple users can connect to your app from their mobile phones by simply hitting a URL on their mobile phone's browsers. We'll use open-source technologies and frameworks for implementing this application. Not only does this mean that you'll be learning VR tech for free, you will also be able to find numerous resources for further research and learning.
The gist of the app is this: for every user who joins your application, a new avatar will appear in your VR scene which will rotate/move in realtime according to the movement of the user's phone in real life.
This app was made for a talk at Front-end connect conference, but I later realized that it would serve as a great getting-started guide for both VR and realtime as separate technologies and for projects when implemented together, as in this case.
What will we use?
As mentioned before, we wish to access VR directly in browsers, without having to download anything. We shall use WebVR to achieve this. WebVR is a web framework allows us to build Virtual Reality applications that are accessible directly on the web, thus eliminating heavy downloads and installs while making Virtual Reality device independent.
However, building applications directly in WebVR is a bit complex; it requires the knowledge of WebGL and more. And since we brought VR to the web, there should be a way for web developers to be able to build VR apps without delving into too much complexity. Fortunately, Mozilla's VR team built a framework on top of WebVR, called A-Frame. A-Frame completely eliminates WebVR's boilerplate code and allows developers to build VR apps with something as simple as HTML.
Further, we'll use deepstream.io to implement all the realtime functionality in the application. deepstream.io is an open realtime server that provides features like PubSub and data-sync. Out of it's five major features - records, RPCs, events, presence and listening- we shall extensively make use presence and records in this tutorial. In my opinion, deepstream provides a very easy way to add realtime functionality to your existing applications. It is also available as a hosted version, called deepstreamHub.
As you know by now, every WebVR application can be accessed from just a browser. This means, we'll need to host our files in order to be able to access them from a mobile device using a URL. Glitch is a very convenient way of doing this. Using Glitch, you can create a new project and when you are done, the URL is readily available so that you can use it via mobile browsers instantly.
Getting started
Let us start by building the basic VR setup for the application. We'll use A-Frame's entity-component system (ECS). ECS makes it easy to build any objects in the scene by treating ev5656ery object as an entity which differs from other entities by the various components (or attributes) that can attached to an entity.
In your HTML file, start of by adding the HTML skeleton code:
      <html>
<head>
<script src="https://cdnjs.cloudflare.com/ajax/libs/deepstream.io-client-js/2.1.1/deepstream.js"></script>
<script src="https://aframe.io/releases/0.5.0/aframe.min.js"></script>
<script type="text/javascript" src="main.js"></script>
<script src="https://unpkg.com/aframe-text-geometry-component@0.5.1/dist/aframe-text-geometry-component.min.js"></script>
</head>
<body>
<a-scene id="scene">
.
.
.
.
</a-scene>
</body>
</html>
The references refer to the following respectively:
- deepstream's Javascript client
- A-Frame's source file
- Our local JS file which we'll use next to add the logic into the app
- A-frame's community contributed - text component to conveniently add text to our VR scene.
All the objects we wish to include in our VR scene must go within the a-scene tag in our HTML file, as scene above (pun intended)! This is analogous to the body tag in regular HTML documents.
Next, we will add all the assets we wish to use within the a-assets tag. Adding all the resources under this tag makes sure that all your assets are pre-loaded before your app shows up, thus preventing a shitty first look due to slow loading of resources.
      <!--assets at one place for better loading-->
<a-assets>
  <img id="pink" src="https://img.gs/bbdkhfbzkk/stretch/http://i.imgur.com/1hyyIUi.jpg" crossorigin="anonymous" />
  <img src="https://img.gs/bbdkhfbzkk/stretch/https://i.imgur.com/25P1geh.png" id="grid" crossorigin="anonymous">
  <img src="https://img.gs/bbdkhfbzkk/2048x1024,stretch/http://i.imgur.com/WMNH2OF.jpg" id="chrome" crossorigin="anonymous">
  <img id="sky" src="https://img.gs/bbdkhfbzkk/2048x2048,stretch/http://i.imgur.com/WqlqEkq.jpg" crossorigin="anonymous" />

  <a-asset-item id="dawningFont" src="https://cdn.glitch.com/c719c986-c0c5-48b8-967c-3cd8b8aa17f3%2FdawningOfANewDayRegular.typeface.json?1490305922844"></a-asset-item>
  <a-asset-item id="exoFont" src="https://cdn.glitch.com/c719c986-c0c5-48b8-967c-3cd8b8aa17f3%2Fexo2Black.typeface.json?1490305922150"></a-asset-item>
  <a-asset-item id="exoItalicFont" src="https://cdn.glitch.com/c719c986-c0c5-48b8-967c-3cd8b8aa17f3%2Fexo2BlackItalic.typeface.json?1490305922725"></a-asset-item>

  <a-mixin id="eye" geometry="primitive: sphere; radius: 0.2" material="shader: flat; side: double; color: #FFF"></a-mixin>
  <a-mixin id="pupil" geometry="primitive: sphere; radius: 0.05" material="shader: flat; side: double; color: #222"></a-mixin>
  <a-mixin id="arm" geometry="primitive: box; depth: 0.2; height: 1.5; width: 0.2" material="color: #222; shader: flat"></a-mixin>
</a-assets>
Feel free to use your own resources to give the app a customized feel!
You will observe that we added two new tags in the above code snippet, let's crack them down:
a-asset-item - invokes the three.js file loader. You can use this to load all file types.
a-mixin - is a very useful tag that allows code reuse by letting you specify a set of properties (components) to be applied to a single entity. You can give it an ID and reference it multiple times. We will have three mixins, each specifying certain attributes of the avatar that we intend to create — the eyes, pupils and arms.
Now, let us add all the static visual elements in our VR scene.
      <!--adds the torusKont-->
<a-entity scale="2 2 2" geometry="primitive: torusKnot" position="0 6 -10" material="color: magenta; metalness:1; roughness: 0.1; sphericalEnvMap: #sky;">
      <a-animation easing="linear" attribute="rotation" dur="10000" to="0 0 360" repeat="indefinite"></a-animation>
</a-entity>

<!--adds the text with custom font-->
<a-entity position="-3 1 -6" rotation="5 0 0">
  <a-entity
        rotation="0 0 5"
        position="0 2 0.2"
        text-geometry="value: Frontend-Connect; font: #dawningFont; bevelEnabled: true; bevelSize: 0.05; bevelThickness: 0.05; curveSegments: 12; size: 1; height: 0;"
        material="color:lavenderblush; metalness:1; roughness: 0; sphericalEnvMap: #pink;">
  </a-entity>

  <!--adds the text with custom font-->
  <a-entity position="-0.5 0.5 -0.5" scale="0.6 1.2 1" text-geometry="value: VR on the web; font: #exoFont; bevelEnabled: true; bevelSize: 0.1; bevelThickness: 0.1; curveSegments: 1; size: 1.5; height: 0.5;" material="color:pink; metalness:0.9; roughness: 0.05; sphericalEnvMap: #chrome;"></a-entity>

  <!--adds the text with custom font-->
  <a-entity position="1 0 0.3" text-geometry="value: 2017; font: #exoItalicFont; style: italic; size: 0.8; weight: bold; height: 0;"
                material="shader: flat; color: white">
  </a-entity>
  <!--adds the text with custom font-->
  <a-entity position="1 0 0.3" text-geometry="value: 2017; font: #exoItalicFont; style: italic; size: 0.8; weight: bold; height: 0; bevelEnabled: true; bevelSize: 0.04; bevelThickness: 0.04; curveSegments: 1"
                material="shader: flat; color: white; transparent: true; opacity: 0.4">
  </a-entity>
</a-entity>

<!--adds the grid to give a perspective of distance-->
<a-entity
      geometry="primitive: plane; width: 10000; height: 10000;" rotation="-90 0 0"
      material="src: #grid; repeat: 10000 10000; transparent: true;metalness:0.6; roughness: 0.4; sphericalEnvMap: #sky;">
</a-entity>

<!--adds the lighting to make the scene more realistic-->
<a-entity light="color: #ccccff; intensity: 1; type: ambient;" visible=""></a-entity>
<a-entity light="color: ffaaff; intensity: 1.5" position="5 5 5"></a-entity>
<a-entity light="color: white; intensity: 0.5" position="-5 5 15"></a-entity>
<a-entity light="color: white; type: ambient;"></a-entity>

<!--adds the sky-->
<a-sky src="#sky" rotation="0 -90 0"></a-sky>
<a-entity position="0 -5 0"
      geometry="primitive: plane; width: 10000; height: 10000;" rotation="-90 0 0"
      material="src: #grid; repeat: 10000 10000; transparent: true;metalness:0.6; roughness: 0.4; sphericalEnvMap: #sky;">
</a-entity>
As you can see, we have implemented the complete app using ECS. However, this is not the only way that you can add objects to the scene. A-Frame comes with a few custom entities such as box, sphere etc. These custom entities are called primitives.
As you can see, the code contains easy-to-follow comments that explain what each of the entity-component set is trying to implement in our app. For VR newbies, here's something interesting — a sky is like a layer that covers your 360° sphere inside which the user "stands" when using the app. It is generally analogous to the sky in real-life which can be seen on the top and appears to drop down near the horizon. We use a-sky in A-Frame to add a sky and the resource to be used can be either a 360° image or just a solid colour.
Now comes the interesting part. We require a camera entity. This is a special entity offered by A-Frame that intrinsically grabs the continously changing position as well as rotation values of your mobile phone while you are using an A-Frame powered VR app in the browser. It takes advantage of the various gyro sensors in your phone to achieve this under the hood.
Here's how we can add a camera entity. We can optionally give it a shape and animation, which helps us track its movement by serving as a cursor.
      <!--camera entity-->
<a-entity>
  <a-entity camera look-controls wasd-controls id="user-cam">
    <a-entity position="0 0 -3" scale="0.2 0.2 0.2" geometry="primitive: ring; radiusOuter: 0.20; radiusInner: 0.13;" material="color: #ADD8E6; shader: flat" cursor="maxDistance: 30; fuse: true">
      <a-animation begin="click" easing="ease-in" attribute="scale" fill="backwards" from="0.1 0.1 0.1" to="1 1 1" dur="150"></a-animation>
      <a-animation begin="fusing" easing="ease-in" attribute="scale" fill="forwards" from="1 1 1" to="0.2 0.2 0.2" dur="1500"></a-animation>
    </a-entity>
  </a-entity>
</a-entity>
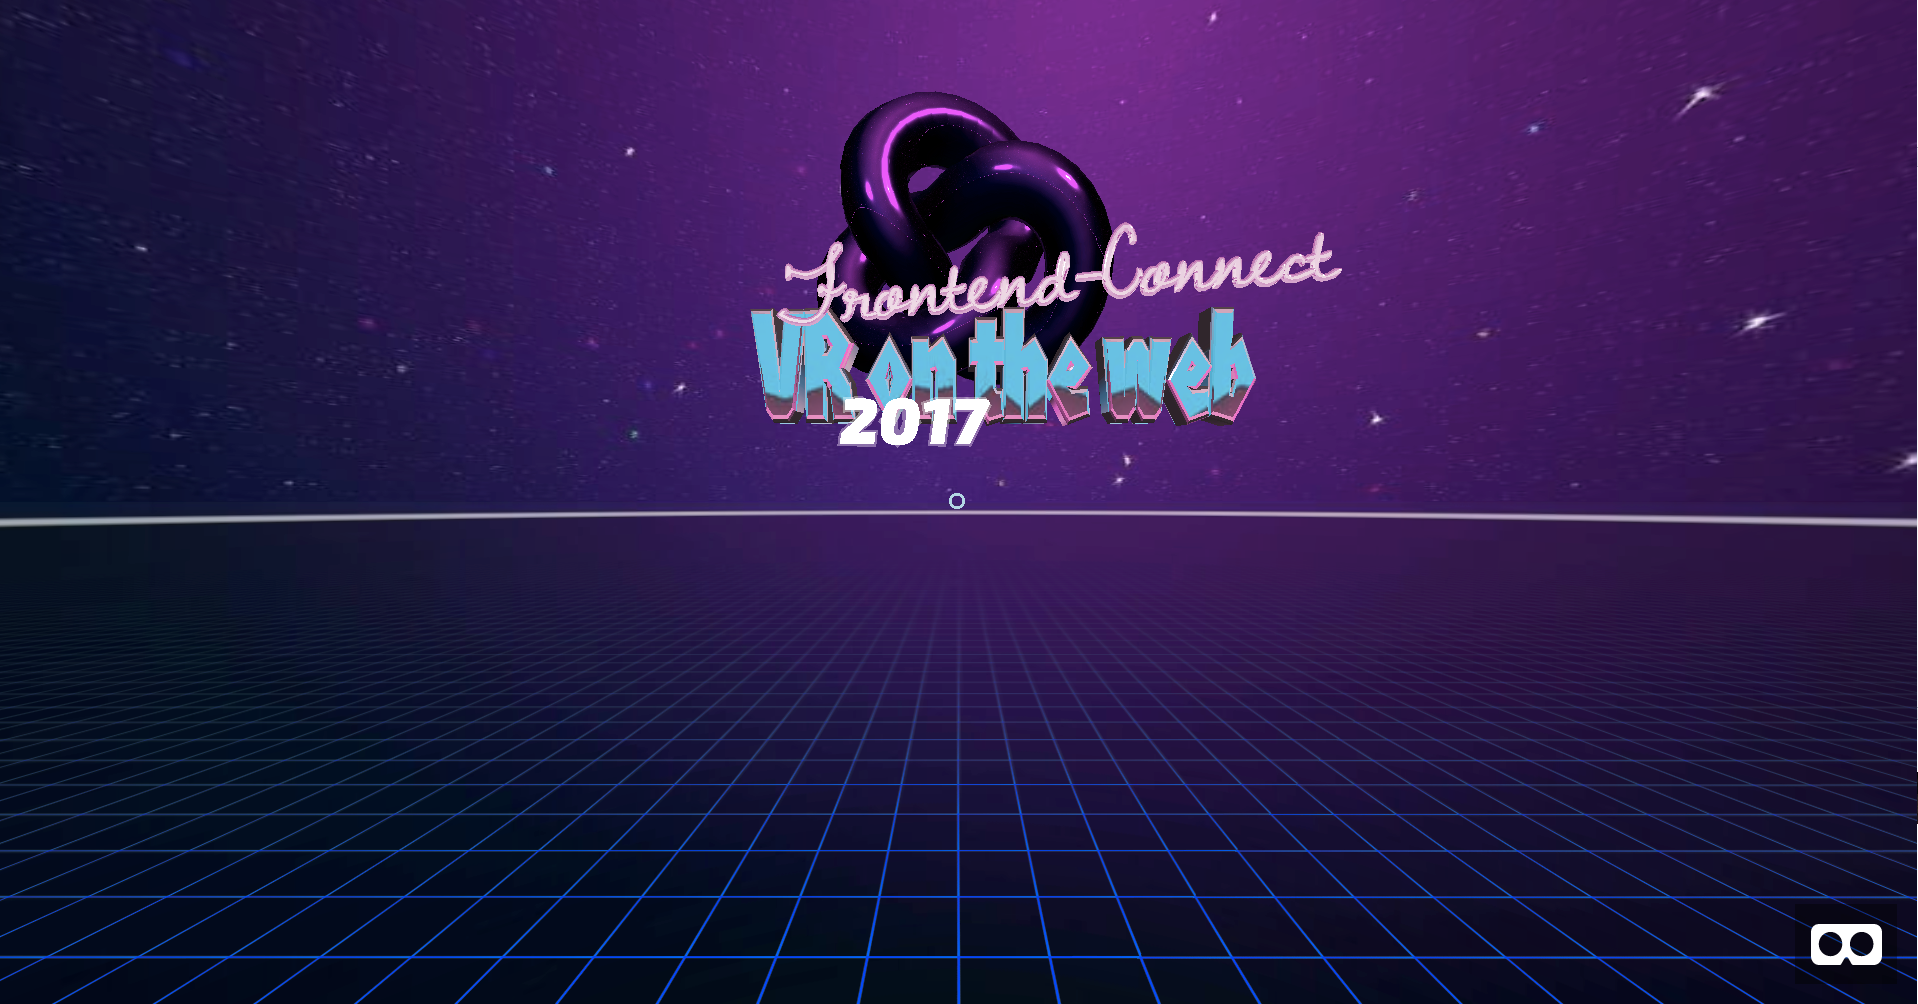
By the end of this section, your VR app should ideally look like the one shown below. (If you've customized your resources, then it'll look cooler than the one below.)
Voila! we just finished setting up the basic VR scene, It's now time to add some funtionality to it in order to make the avatars appear, dissappear and move around in realtime as the users log in and out of your application or simply move their phone around.
Adding realtime functionality
It's time to spin up some magic into our VR scene. Using deepstream is very easy compared to any of the other existing alternatives like Firebase.
Start by connecting your client/user to deepstream:
      var client = deepstream("<YOUR APP URL>");
client.login({}, function(success, data) {
  if (success) {
    startApp(data);
  } else {
    //handle login failed
  }
});
We can connect to deepstream's JS client as shown above. For this tutorial, I have used deepstream's hosted version called deepstreamHub. For this, navigate to deepstream's dashboard and create an account for free. Next, add a new application and give it a name. On the home page of this application, you'll find something called the APP URL. Add this URL in the above code.
deepstream comes with many authentication mechanisms. For our application, we will simply use the NO AUTH mechanism for the sake of simplicity of this tutorial. This is the reason why the first parameter of the login method is left empty. You can also choose to skip this paramater completely. Login method's callback has two parameters- success is a boolean variable, which if true implies that the login was successful and data contains some user specific data such as a unique ID. This data is different for different users. We'll use this unique ID in order to differentiate between multiple avatars generated by different users that would appear in the scene.
      //startup by creating a new record for each user
function startApp(data) {
  var x = Math.random() * (10 - -10) + -10;
  var y = 0;
  var z = 0;
  var initialPosition = { x: x, y: y, z: z };

  var myBoxColor = "#222";
  var currentUser = client.record.getRecord("user/" + data.id);
  currentUser.whenReady(function() {
    currentUser.set({
      type: "a-box",
      attr: {
        position: initialPosition,
        rotation: "0 0 0",
        color: myBoxColor,
        id: data.id,
        depth: "1",
        height: "1",
        width: "1"
      }
    });
    var camera = document.getElementById("user-cam");

    //update camera position
    var networkTick = function() {
      var latestPosition = camera.getAttribute("position");
      var latestRotation = camera.getAttribute("rotation");
      currentUser.set({
        attr: {
          position: latestPosition,
          rotation: latestRotation
        }
      });
    };
    setInterval(networkTick, 100);
  });

  //deepstream's presence feature
  client.presence.getAll(function(ids) {
    ids.forEach(subscribeToAvatarChanges);
  });

  client.presence.subscribe((userId, isOnline) => {
    if (isOnline) {
      subscribeToAvatarChanges(userId);
    } else {
      removeAvatar(userId);
    }
  });
}
For simplicity, we'll restrict the avatar's rotation/movement to x-axis only, while keeping the coordinates on the other two planes as zero. The initial position on x-axis is chosen randomly so that multiple avatars do not clutter at the same point in the scene as soon as they appear.
a-box is a primitive in A-Frame that can be conveniently used to create a 3D box with basic attributes such as dimensions, position, rotation, color etc. We shall store these attributes using a record in deepstream and we'll add all the other parts of the avatar, i.e eyes and arms, with respect to this box's position (which serves as the head of the avatar).
Records are documents in deepstream's realtime data-store. We make use of this feature to store the attributes like id, position, rotation, etc of all the users, which will be later implied on their respective avatars.
We retrieve an existing record or create a new one using client.record.getRecord(<record name>); We will ensure that it's a unique record for every user by adding the client's id to the name(path) of the record. Further, we need to add all the required attribures in this record, including the initial position which is selected at random. As discussed above, we track the movement of the phone by using the camera entity and we update this data every 100 milliseconds as seen above and consequently set this new data in the record each time.
Presence is a common term in the realtime world. It gives you the information about the user's online status. In our case, we would display the avatar in the scene only when a user comes online (hits the URL) and make it disappear as soon as a user quits the app (i.e. closes the browser window). Additionally, deepstream allows you to subscribe to presence. This lets you fire a callback every time a new user logs in or an existing user logs out. This is exactly what we require in our app.
As soon as a user comes online, we will make the user subscribe to the changes in the record. These changes, as you can imagine will be in the attr object due to changing position and rotation. Our goal is to update the avatar as these attributes update.
Before that, we first need to ensure that the avatar is created atleast once, for it to update it's attributes. We do this by using a simple map of avatars where we store the IDs of all the existing avatars.
      //check if avatar needs to be created or updated
function avatarExists(id) {
  return avatars.hasOwnProperty(id);
}
      //subscribe to changes in attributes
function subscribeToAvatarChanges(id) {
  var newUser = client.record.getRecord("user/" + id);
  newUser.whenReady(function() {
    newUser.subscribe("attr", attr => {
      if (avatarExists(id)) {
        updateAvatar(id, newUser);
      } else {
        createAvatar(id, newUser);
      }
    });
  });
}
We create a new avatar by setting the right attributes (mainly the position and rotation) for the right parts of the avatar. I believe the following function is very straight forward:
      //add Avatar when user enters the app
function createAvatar(id, rec) {
  var attr = rec.get("attr");
  var type = rec.get("type");
  var newBox = document.createElement(type);
  for (var name in attr) {
    newBox.setAttribute(name, attr[name]);
  }

  //compute and assign position values to other parts of the avatar
  //wrt the box
  var leye = document.createElement("a-entity");
  leye.setAttribute("mixin", "eye");
  var reye = document.createElement("a-entity");
  reye.setAttribute("mixin", "eye");

  var lpupil = document.createElement("a-entity");
  lpupil.setAttribute("mixin", "pupil");
  var rpupil = document.createElement("a-entity");
  rpupil.setAttribute("mixin", "pupil");

  var larm = document.createElement("a-entity");
  larm.setAttribute("mixin", "arm");
  var rarm = document.createElement("a-entity");
  rarm.setAttribute("mixin", "arm");

  var x = attr.position.x;
  var y = 0;
  var z = 0;

  var leyex = x + 0.25;
  var leyey = y + 0.2;
  var leyez = z - 0.6;

  var reyex = x - 0.25;
  var reyey = y + 0.2;
  var reyez = z - 0.6;

  var lpx = x + 0.25;
  var lpy = y + 0.2;
  var lpz = z - 0.8;

  var rpx = x - 0.25;
  var rpy = y + 0.2;
  var rpz = z - 0.8;

  leye.setAttribute("position", leyex + " " + leyey + " " + leyez);
  leye.setAttribute("id", "leye" + id);
  reye.setAttribute("position", reyex + " " + reyey + " " + reyez);
  reye.setAttribute("id", "reye" + id);

  lpupil.setAttribute("position", lpx + " " + lpy + " " + lpz);
  lpupil.setAttribute("id", "lpupil" + id);
  rpupil.setAttribute("position", rpx + " " + rpy + " " + rpz);
  rpupil.setAttribute("id", "rpupil" + id);

  var larmx = x - 0.5;
  var larmy = y - 1.8;
  var larmz = z;

  var rarmx = x + 0.5;
  var rarmy = y - 1.8;
  var rarmz = z;

  larm.setAttribute("position", larmx + " " + larmy + " " + larmz);
  larm.setAttribute("id", "larm" + id);
  larm.setAttribute("rotation", "0 0 -10");
  rarm.setAttribute("position", rarmx + " " + rarmy + " " + rarmz);
  rarm.setAttribute("id", "rarm" + id);
  rarm.setAttribute("rotation", "0 0 10");

  //wrap the whole avatar inside a single entity
  var avatarRoot = document.createElement("a-entity");
  avatarRoot.appendChild(newBox);
  avatarRoot.appendChild(leye);
  avatarRoot.appendChild(reye);
  avatarRoot.appendChild(lpupil);
  avatarRoot.appendChild(rpupil);
  avatarRoot.appendChild(larm);
  avatarRoot.appendChild(rarm);

  var scene = document.getElementById("scene");
  scene.appendChild(avatarRoot);

  avatars[id] = avatarRoot;
}
The relative positions of eyes and arms with respect to the box are applied manually. This becomes easier with the use of a visual inspector tool that comes with A-Frame.
We wrap all parts of the avatar into a root element so that it becomes easier to apply attribute changes to the whole avatar and avoid a zombie-like situation where one of the parts is disoriented relative to others. This also makes it easy to delete the whole avatar when a user logs out.
If an avatar already exists, we simply update it's position and rotation from the continually updating data in the attr object in the user record. If you scroll back up to the subscribeToAvatarChanges() function, you will observe that the updateAvatar() is a callback function to a record subscription. In deepstream, the callback function is fired everytime the data in the subscribed record/path changes. This makes it very easy for us to continually update the actual avatar as well, according to the changing data.
      //update Avatar according to changing attributes
function updateAvatar(id, userRecord) {
  var avatar = avatars[id];
  var position = userRecord.get("attr.position");
  var rotation = userRecord.get("attr.rotation");

  avatar.setAttribute("position", position);
  avatar.setAttribute("rotation", rotation);
}
Finally, we need to ensure that the avatar is removed from the scene whenever a user logs out. This can be done using presence by handling the logout flag in the callback. Here are a few things you need to do when a user logs out:
      //remove Avatar when user quits the app
function removeAvatar(id) {
  var scene = document.getElementById("scene");
  scene.removeChild(avatars[id]);
  client.record.getRecord("user/" + id).delete();
}
We start by removing the complete avatar from the scene. We also make sure to delete the corresponding record as well in order to ensure that we don't waste unnecessary storage space.
Conclusion
We have now successfully implemented a simple VR app in realtime. Go ahead and test it out with your friends and let them witness the magic. If you have been working in a local environment, you might need a local server to host your files. As mentioned above, I personally use glitch for all my VR projects. It automatically hosts all the projects and gives a URL which can be instantly used on multiple devices for the applications like we just built.
You now know the basics of both A-Frame and deepstream allowing you to build both VR apps and realtime apps or both together like we just did. Ideas are already brewing in your mind? Go ahead and build that app you've always wanted to! Here's the complete source code for this application.
Thanks for reading this guide! Feel free to shout to me on Twitter if you get stuck or would like to know more about something.
Advance your tech skills today
Access courses on AI, cloud, data, security, and more—all led by industry experts.


