- Lab
- Cloud
Develop with WebJobs in Azure
Azure WebJobs run executables or scripts in the context of an application, whether it's a web app, an API app, or a mobile app. Think of them as scheduled tasks (cron jobs) that can be run in the Azure App Service, as opposed to on a virtual machine. In this hands-on lab, we will deploy a WebJob that resizes images that are uploaded to blob storage. This solution can be used for something like a blog site, where smaller images are required for thumbnails and galleries. 2 Lessons Learned: - Using Visual Studio to deploy an application to an Azure Web App - Deploying a WebJob to an Azure Web App - Modifying the properties of the WebJob in the Azure Portal - Using the WebJob dashboard to view logs
Path Info
Table of Contents
-
Challenge
Download the Visual Studio Solution, WebJob, and Sample Images
Using the Azure Portal, download the Remote Desktop Protocol (RDP) file for the virtual machine. The VM name will differ based on the lab, but will always begin with
vm-.Login credentials:
Username: azureuser Password: Please use the password provided in the VM credentials section of this lab.
The following script will download the PhotoStor Web App, the Thumbnailer WebJob, and some sample images that we will use in the lab.
Powershell code to run:
Add-Type -AssemblyName System.IO.Compression.FileSystem

$url = "https://github.com/linuxacademy/content-az-300-lab-repos/blob/master/create-an-azure-web-app/LA_PhotoStor.zip?raw=true"
$url2 = "https://github.com/linuxacademy/content-az-300-lab-repos/blob/master/create-an-azure-web-app/images.zip?raw=true"
$url3 = "https://github.com/linuxacademy/content-az-300-lab-repos/blob/master/develop-with-webjobs-in-azure/Thumbnailer.zip?raw=true"

$zipfile = "C:\Users\azureuser\Desktop\LA_PhotoStor.zip"
$zipfile2 = "C:\Users\azureuser\Desktop\images.zip"
$zipfile3 = "C:\Users\azureuser\Desktop\Thumbnailer.zip"

$folder = "C:\Users\azureuser\Documents\VS"
$folder2 = "C:\Users\azureuser\Pictures"

[Net.ServicePointManager]::SecurityProtocol = [Net.SecurityProtocolType]::Tls12
Invoke-WebRequest -UseBasicParsing -OutFile $zipfile $url

[System.IO.Compression.ZipFile]::ExtractToDirectory($zipfile, $folder)

[Net.ServicePointManager]::SecurityProtocol = [Net.SecurityProtocolType]::Tls12
Invoke-WebRequest -UseBasicParsing -OutFile $zipfile2 $url2

[System.IO.Compression.ZipFile]::ExtractToDirectory($zipfile2, $folder2)

[Net.ServicePointManager]::SecurityProtocol = [Net.SecurityProtocolType]::Tls12
Invoke-WebRequest -UseBasicParsing -OutFile $zipfile3 $url3

[System.IO.Compression.ZipFile]::ExtractToDirectory($zipfile3, $folder)

Remove-Item -Path $zipfile
Remove-Item -Path $zipfile2
Remove-Item -Path $zipfile3
#
The trailing hashtag is used so we paste and run the script in full.
-
Challenge
Deploy the PhotoStor Web App Using Visual Studio
In this task, we are going to deploy a fully functional web application that will allow us to upload images into Azure Blob Storage. We will deploy the code into the pre-provisioned App Service Web App.
Note: The next steps will all be completed on the VM
- Use Visual Studio 2017 to open the solution (
.sln) file that you downloaded in Step 2. When prompted, sign in to your lab (NOT VM) account using the credentials above. - Right-click the PhotoStor project and click Publish
- Choose Azure App Service and Select existing. Click Publish.
- Expand the lab resource group and click the webapp2-XXXXX Web App.
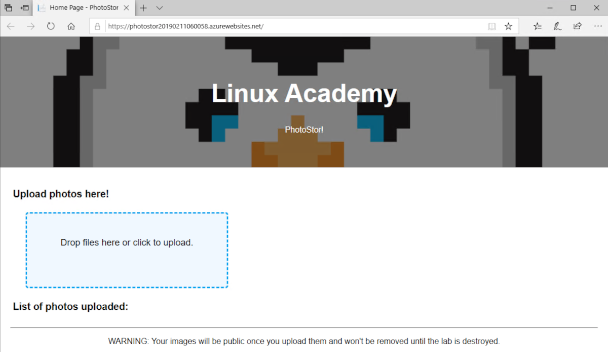
- Click OK. Visual Studio will publish the Web App and open it in a web browser when complete. You will see a site that looks like this:
- Use Visual Studio 2017 to open the solution (
-
Challenge
Test the PhotoStor Web App by Uploading Sample Images
Open a new browser tab (or use the browser window that was automatically opened in the virtual machine) and navigate to the Web App URL. You can copy this value from the Overview pane of the Web App blade.
Upload the sample images downloaded in Task 2 by either clicking the upload box or dragging them from File Explorer (drag and drop does not work with Edge). Don't upload them all, as we will use two or three in the next objective.
You will see the images being uploaded to blob storage, and once there each image will be listed below the upload box:
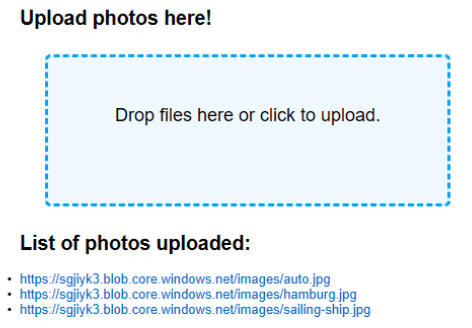
Clicking any of the hyperlinks will result in the image being displayed.
-
Challenge
Create Additional Web App Settings For Use by the WebJob
To save time, the Web App was already pre-deployed with settings to interact with blob storage. However, additional settings are required for the WebJob to interact with blob storage. We will configure those now.
We're creating three settings:
| App Setting Name | Value | |----------------------------------------|---------------------------------------------------------| | AzureStorageConfig__ThumbnailContainer | thumbnails | | AzureWebJobsDashboard | DefaultEndpointsProtocol=https;AccountName=;AccountKey= | | AzureWebJobsStorage | DefaultEndpointsProtocol=https;AccountName=;AccountKey= |
Note: Insert the storage account name and access key values into the AzureWebJobsDashboard and AzureWebJobStorage values, between the = and the ;, like this:
DefaultEndpointsProtocol=https;AccountName=STORAGE_ACCOUNT_NAME;AccountKey=STORAGE_ACCOUNT_KEYThere's some preparation before this step. We need to get those values. Let's open up a text editor and paste that line into it. We can paste the other two values as we get them. It will save typing, and possibly avoiding a fat-fingering type of mistake.
To find the values we need, we've got to get into our Azure Portal. Click on Storage accounts in the main menu on the left, and then click on our storage account. We need the name of the storage account, and our storage account key. The first is easy to find, because it's right there in front of us on the overview page. For the key though, click on Access keys under Setttings in the menu to the left. Copy the first key and paste it into the text editor we opened up earlier.
Navigate to the Web App in the Portal. In the Web App menu, click Application Settings.
In the Application settings section, there's an Add new setting link. If we click on that, we're greeted with a pair of input boxes where we can enter a name and a value.
Now we can add the new settings. The only thing left is to set the Always On slider to On.
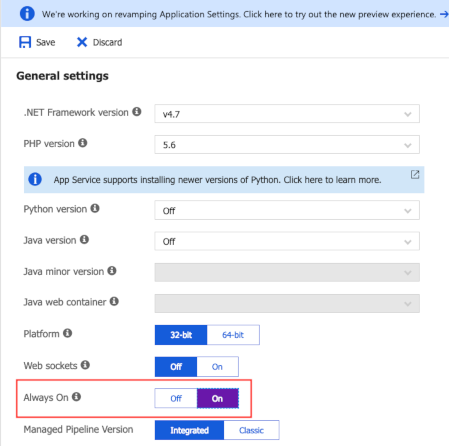
Click Save at the top of the pane.
-
Challenge
Open the WebJob in Visual Studio and Familiarize Yourself with the Code
Now let's have a look at the WebJob that will resize our images.
On the virtal machine, close the PhotoStor Web App solution, saving if prompted. Open the
Thumbnailer.slnfile that we downloaded in Objective 1.Open the
functions.csfile in Solution Explorer and familiarize yourself with the functions. Afterward, proceed to the next objective. -
Challenge
Publish the Thumbnailer WebJob to Your Web App
Now we are ready to publish our WebJob.
- In Solution Explorer, right-click the Thumbnailer project and click Build. After a few seconds, the Output window should show that the application was successfully built.
- In Solution Explorer, right-click the Thumbnailer project and click Publish as Azure Webjob.
- Select Microsoft Azure App Service as the publish target, and then click Next >.
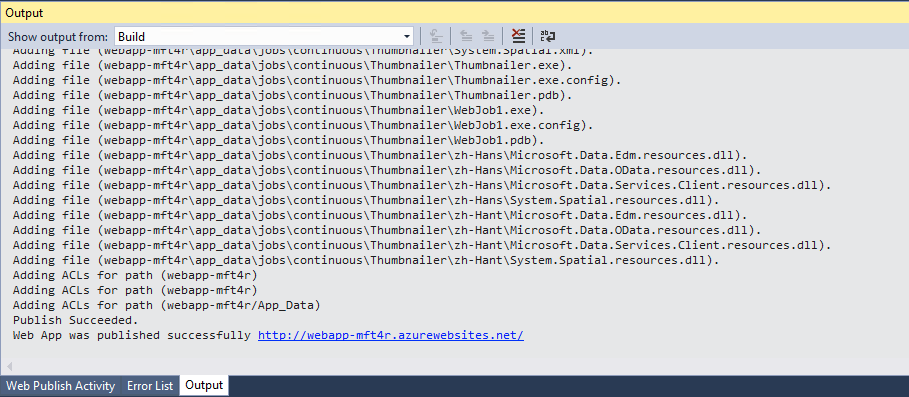
- Accept the defaults on the next page and then click Validate Connection. You should see a green check mark once the connection has been validated. Click Publish. You will see the following output when publishing has successfully completed:
-
Challenge
Refresh Your Web Browser to View the Thumbnails
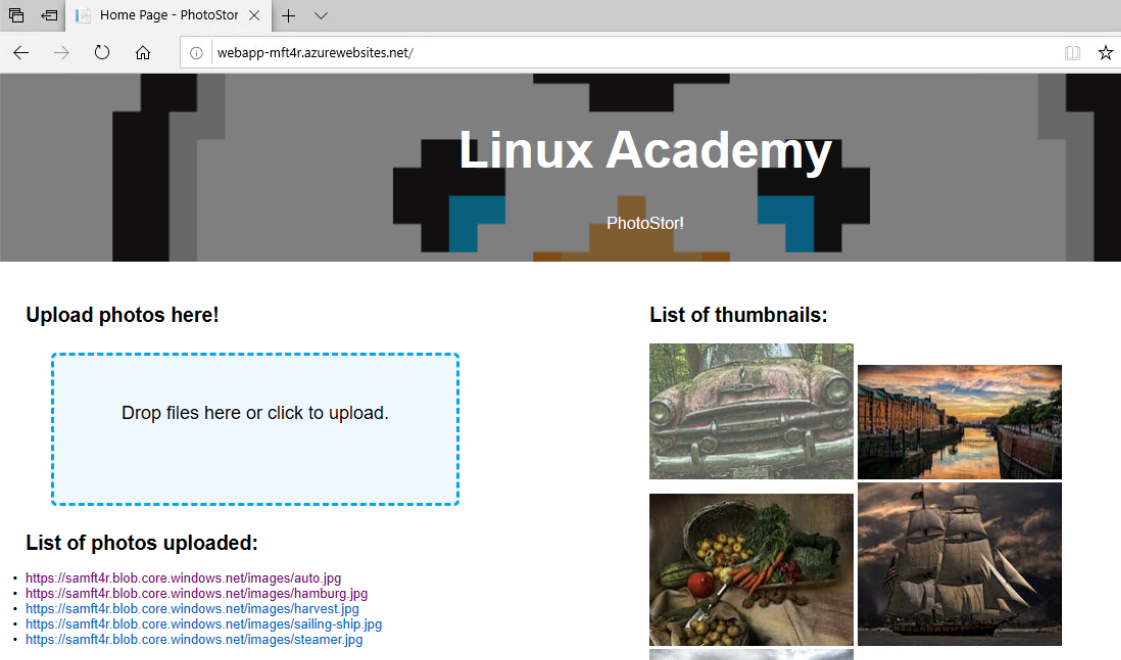
Refresh your web browser (or reopen if you've closed it). The WebJob should have already completed its first pass on images in the images container. Now, in addition to the list of image URLs, you should now also see thumbnails of the images on the right-side of the page!
-
Challenge
Upload a Few More Images to Blob Storage
Upload a few more sample images downloaded in task 2 by either clicking the upload box or dragging them from File Explorer (again, drag and drap does not work with Edge). The list of images should now include the images you just uploaded.
Where are my thumbnails?
The images were uploaded successfully. However, the WebJob has not yet run against the images container. Why?
Although our WebJob is "continuous" in nature, meaning that it runs all the time, blob storage containers are only checked for new incoming blobs every 10 minutes. This means that our WebJob will eventually process the new incoming blobs, but it might take a while to do so. We can either wait, or simply restart the WebJob, which forces a check of the blob container every time it is started and stopped.
In the Azure Portal, navigate to the Web App. In the Web App blade, click on WebJobs. In the WebJobs lens, click on the WebJob and then click Stop. Once the WebJob is stopped, refresh the Web App in your web browser and the thumbnails will have appeared.
-
Challenge
Review the WebJob Logs in the WebJobs Dashboard
The WebJob dashboard is a convenient place to review the logs of a particular WebJob, including a list of the recent invocations.
In the WebJob lens, select the WebJob and then click *Logs. The dashboard opens in a new browser tab. Here you can view the current status of the WebJob, its associated functions, and its recent invocations.

What's a lab?
Hands-on Labs are real environments created by industry experts to help you learn. These environments help you gain knowledge and experience, practice without compromising your system, test without risk, destroy without fear, and let you learn from your mistakes. Hands-on Labs: practice your skills before delivering in the real world.
Provided environment for hands-on practice
We will provide the credentials and environment necessary for you to practice right within your browser.
Guided walkthrough
Follow along with the author’s guided walkthrough and build something new in your provided environment!
Did you know?
On average, you retain 75% more of your learning if you get time for practice.


